How to Customize a Roblox Speed Escape Template
Plan a +1 speed escape game around training, movement, obstacles, and rewards. A step-by-step workflow for configuring and testing an editable Roblox template.
Understand the training-to-escape loop
Before changing values, play the first few minutes from a fresh test state. Identify how a player starts training, how the interface describes progress, where the first course begins, and what happens after success or failure. Keep a backup before making any changes.
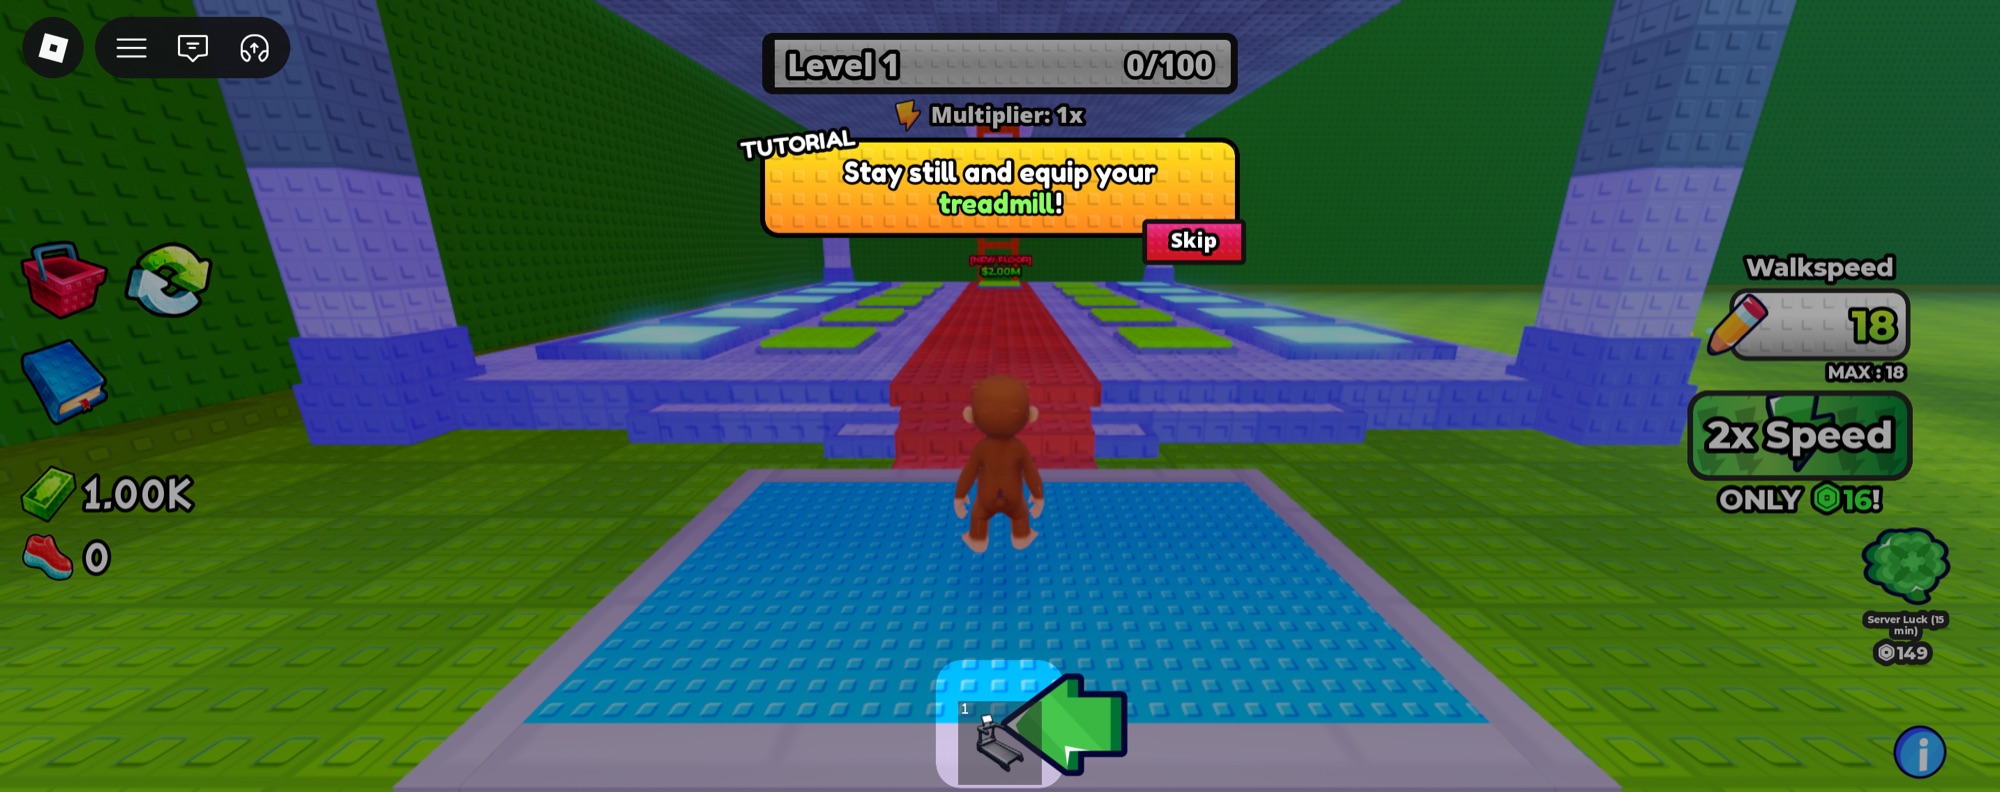
The +1 Speed Escape gallery shows treadmill training, level and multiplier displays, walk-speed information, a course, and a character index. Map those visible features to the relevant scripts and configuration in Studio. Names and locations vary between projects, so follow the actual references instead of assuming a universal 'SpeedConfig' file exists.
Tune speed and course geometry together
Increasing speed without revisiting the course can make an obstacle trivial, impossible to read, or awkward to control. Choose the experience you want: short precise runs, a gradual training climb, or a broader course with room to steer. Then evaluate movement at the slowest and fastest states a player can realistically reach.
Write down the training value, course section, success rate, and reason for failure during each test. If players fail because they cannot see the turn in time, changing the reward may not solve the problem. Adjust the relevant geometry or presentation, then test the same section again.
- Record the current movement and training behavior before editing.
- Change one progression value or one obstacle section, not both at once.
- Repeat the route at early and later progression states.
- Check camera movement and touch control before keeping the change.
Teach one action at a time
A first-time player should understand where to go and what the next action does. Start with the first training interaction, then the route to the first challenge, then the reward. Remove or rewrite instructions that refer to a name or button you have changed.
Watch for a mismatch between visual progress and actual progress. If a counter increases but the player cannot explain what it unlocks, add a clear next objective. This is a design question to verify with a real playtest, not something a source file can answer automatically.
Give the collection and shop a consistent role
The included character index presents several visual categories, and the shop presents character and upgrade offers. Decide how these fit your version before expanding them. Document whether a change affects appearance, progression, access, or a combination, and make the interface explain that distinction.
Review your own purchase IDs and current product settings. Roblox passes and developer products have different purchase behavior, so use the appropriate flow for each benefit. Check the actual fulfillment code and verify cancellation and repeated purchase notifications; a shop screen alone is not proof that a reward is handled correctly.
Run a small regression checklist after every change
Test a new player reaching the first course, a faster player repeating it, a character reset during an attempt, and a player leaving after receiving a reward. Repeat the essential inputs on a phone-sized viewport, then on a real device when possible. Review both client and server Output for repeated errors.
For each failure, keep the steps and expected result together. 'At high speed, the camera hides the second obstacle' gives you a specific fix. Before release, use a published test version to verify that required assets and settings work outside the local editing session.
This is a customization and test plan, not a claim that every feature or third-party integration has already been verified for your future release.
Verify your changes against a working baseline
Speed progression, obstacle timing and rewards for completing a course. Start with the original download, then repeat these checks after each edit. Keep the test experience separate from live player data.
- Begin at the starting speed and confirm the training display matches the movement speed.
- Run the first obstacle at low and high speed; test failure, respawn and successful completion.
- Check rewards and collected characters after leaving and rejoining a private test experience.
When a test fails
If progression skips an obstacle, compare the start, failure and reward triggers at both speeds. Change one movement or course value at a time so you can identify which change affected the result.
Write down the downloaded filename, what you changed, the expected result, the actual result, and whether the issue happens on the server or a client. Include those details when asking for setup support.
Keep a repeatable checklist
Use the free Roblox launch checklist to keep track of setup, gameplay, data, and release checks. If you are still choosing a foundation, compare the four source templates before buying.
See the screenshots, included source, price, and setup expectations.
Official references
This is an editorial workflow, not an automatic audit or a claim that your changes have been tested. Check Roblox's current documentation for platform behavior and requirements.